Turn on any tap in your house and consider what’s actually in the water. Depending on where you live, that stream may carry chlorine residue, lead from corroding pipes, sediment, or disinfection byproducts — all before it reaches your glass, your shower, or your children’s bath. A whole home water filtration system intercepts contamination at the main supply line, so every faucet, fixture, and appliance runs on filtered water from the moment it enters the house.
Countertop pitchers and under-sink units only protect a single tap. A whole home system protects the entire plumbing network — one installation point, full coverage. The daily difference shows up as softer skin after showers, cleaner-tasting water from every faucet, and appliances that stop accumulating mineral scale.
Picking the right system, though, takes more than choosing a brand off a shelf. You need to match the system type to your water source, size it correctly for your household’s flow rate, budget realistically for installation, and understand what ongoing maintenance actually costs. Each of those decisions is covered below.
How a Whole Home Water Filtration System Works
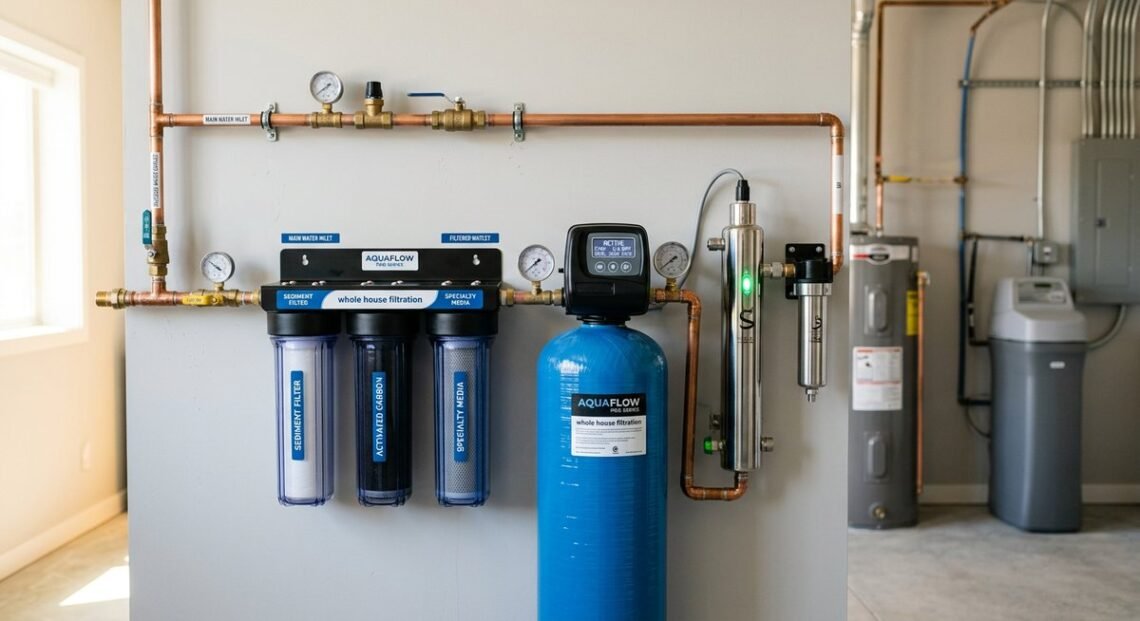
The system installs on the main water supply line — upstream of every tap, shower, and appliance — and pushes water through two to four sequential filter stages. Each stage targets a distinct category of contaminants. Most systems handle sediment, chlorine, VOCs, and heavy metals in a single pass that takes seconds.
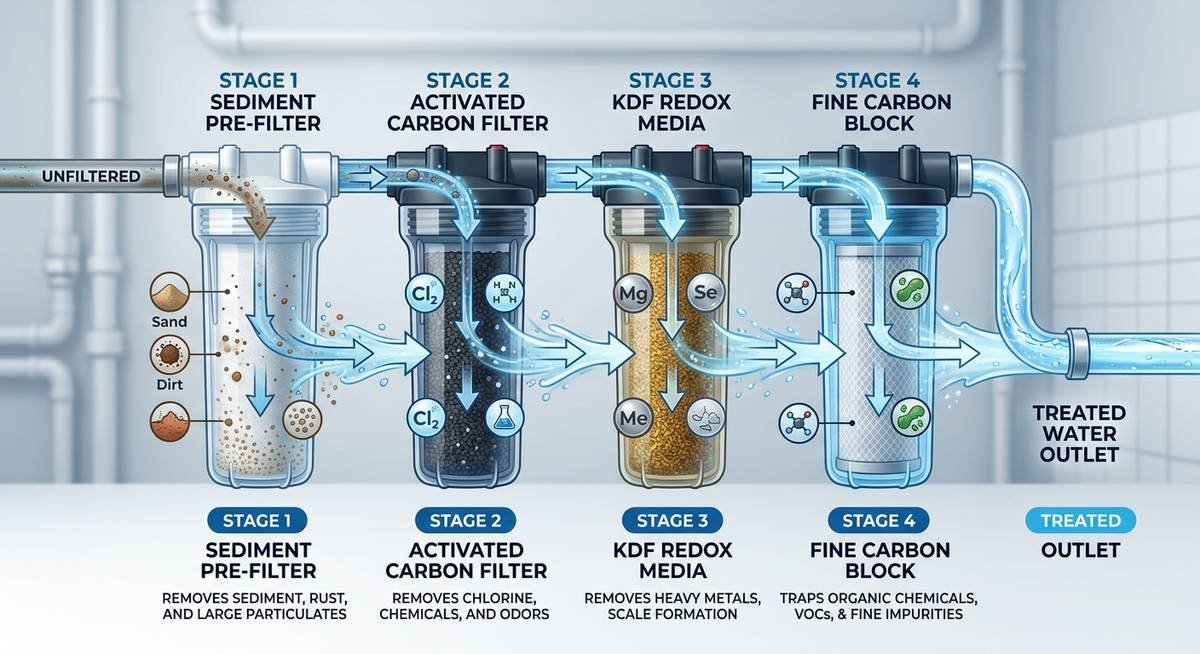
No single filter medium handles every contaminant. Sediment clogs carbon. Carbon can’t kill bacteria. Specialty media saturates if hit with particulates it wasn’t designed to catch. The multi-stage sequence exists because each filter needs the one before it to do its job first.
Stage 1 — Sediment Pre-Filter
Water hits the sediment pre-filter first — typically rated at 5 to 20 microns. Sand, silt, rust flakes, and suspended particulates get physically trapped here, well before they can reach (and shorten the life of) the more expensive carbon and specialty media downstream.
Sediment filters carry the heaviest mechanical load in the system. Manufacturers generally recommend swapping them every three months, though well water households or homes with older iron pipes may burn through them faster. A clogged sediment filter is also the most common culprit behind sudden water pressure drops.
Stage 2 — Activated Carbon Filter
After sediment removal, water flows through activated carbon — either a carbon block or granular activated carbon (GAC) format. Contaminant molecules bond to the massive internal surface area of the carbon medium and get pulled from the water stream. Chlorine, chloramines, volatile organic compounds (VOCs), herbicides, pesticides, and the taste-and-odor compounds that make tap water smell like a pool are all addressed here.
Certification matters. NSF/ANSI Standard 42 covers aesthetic improvements — chlorine taste and odor reduction. NSF/ANSI Standard 53 certifies the removal of health-effect contaminants, including certain VOCs and lead. A filter carrying both certifications provides meaningfully stronger protection than one with neither.
Stage 3 — Specialty Media (Lead, PFAS, Hardness)
The third stage is where configurations diverge based on what’s actually in your water. Several targeted media types address contaminants that carbon alone can’t fully handle.
| Contaminant | Specialty Media Used | Relevant Certification |
|---|---|---|
| Lead | Advanced carbon block, KDF-55 | NSF/ANSI 53 |
| PFAS (PFOA/PFOS) | High-density activated carbon, ion exchange resin | NSF/ANSI 53, NSF P473 |
| Hardness minerals (calcium, magnesium) | Ion exchange resin (water softener stage) | NSF/ANSI 44 |
| Iron / Manganese | Oxidizing filter media (birm, greensand) | NSF/ANSI 42 |
PFAS certification deserves a closer look. NSF P473 is the protocol specifically designed to verify PFOA and PFOS reduction — not NSF/ANSI 58, which covers reverse osmosis systems broadly. If PFAS is your primary concern, look for P473 on the product data sheet.
Optional Stage — UV Purification
Ultraviolet light kills bacteria, viruses, and protozoa by disrupting their DNA — no chemicals required. UV is essential for well water systems and a smart add-on for anyone who wants a final biological safety net. The bulb needs replacement annually, typically at $30–$60.
City Water vs. Well Water — Choosing the Right System
Municipal water and well water demand fundamentally different filtration configurations. City water arrives pre-treated but loaded with disinfection chemicals and pipe-leached metals. Well water arrives raw — untreated, and potentially carrying bacteria, iron, and dissolved gases. Getting this distinction wrong means buying a system that either over-engineers for problems you don’t have or completely misses the ones you do.
Municipal (City) Water Concerns
Water utilities disinfect with chlorine or chloramine by law. Effective against pathogens, yes — but those same chemicals react with naturally occurring organic matter to form trihalomethanes (THMs) and haloacetic acids, which the EPA classifies as probable human carcinogens at elevated exposure levels.
Lead is a different beast. The EPA estimates approximately 9.2 million lead service lines still connect homes to municipal mains across the United States. Treated water picks up lead contamination long after leaving the treatment plant. Meanwhile, USGS sampling has detected pharmaceutical traces — hormones, antibiotics, antidepressants — in municipal supplies, though at concentrations currently below federal action levels.
For city water, a carbon-heavy system is the right foundation. Activated carbon handles chlorine, chloramines, THMs, and VOCs effectively. Add a lead-reduction stage if your home has pre-1986 plumbing, and you’ve addressed the vast majority of municipal risk factors.
Private Well Water Concerns
Private wells receive zero municipal treatment. Contamination is entirely the homeowner’s problem to find and fix. The CDC reports that roughly 43 million Americans rely on private wells not subject to federal Safe Drinking Water Act regulations.
Well water contaminant profiles tend to be more complex. Iron and manganese stain fixtures and leave a metallic taste. Hydrogen sulfide produces a rotten-egg smell even at trace levels. Nitrates from agricultural runoff or septic seepage are colorless and odorless but dangerously toxic to infants. Coliform bacteria remain a persistent risk in shallow or aging wells.
A proper well water setup requires a sediment pre-filter, an iron/manganese oxidizing filter, a carbon stage for organics, and a UV purification chamber for biological safety. Many aquifers also deliver enough hardness minerals to warrant a water softener or salt-free conditioner.
Quick-Reference Comparison Table
| Contaminant | City Water | Well Water | Recommended Filter Stage |
|---|---|---|---|
| Chlorine / Chloramines | Very common | Absent | Activated carbon (GAC or carbon block) |
| Disinfection Byproducts (THMs) | Common | Absent | Activated carbon — NSF/ANSI 53 |
| Lead | Possible (aging pipes) | Possible (plumbing) | KDF-55 or advanced carbon block |
| PFAS | Increasingly detected | Increasingly detected | High-density carbon or ion exchange — NSF P473 |
| Iron / Manganese | Rare | Very common | Oxidizing filter (birm, greensand) |
| Bacteria / Viruses | Rare (treated) | Common risk | UV purification |
| Nitrates | Rare | Common (rural) | Ion exchange or reverse osmosis |
| Hardness Minerals | Varies by region | Very common | Ion exchange softener or salt-free conditioner |
How to Size a System for Your Home
Most households need a whole home water filtration system rated between 10 and 20 gallons per minute (GPM). Undersizing is the most common — and most expensive — mistake buyers make. It causes pressure drops that weaken showers and starve appliances.
Understanding Flow Rate (GPM)
GPM measures how much water flows through your pipes per minute at peak demand. Average usage doesn’t matter here — simultaneous worst-case load does.
Run the numbers: a standard shower pulls about 2 GPM, a dishwasher about 1.5, a flushing toilet 2–3, and a kitchen faucet 1.5–2. Stack those together — shower running while the dishwasher cycles and someone flushes — and you’re at 7–9 GPM before anyone touches the washing machine. A system rated below that threshold will choke noticeably.
A 10 GPM system handles modest demand in a 1–2 bathroom home. Anything larger should treat 15–20 GPM as the baseline, not a luxury upgrade.
Matching System Capacity to Home Size
Filter capacity — total gallons processed before media replacement — matters as much as flow rate. A high-GPM system paired with a low-capacity filter burns through media quickly, inflating long-term costs.
| Home Size | Recommended GPM | Filter Capacity | Port Size |
|---|---|---|---|
| 1–2 bathrooms | 10 GPM | 300,000–500,000 gallons | 3/4 inch |
| 3–4 bathrooms | 15 GPM | 500,000–1,000,000 gallons | 1 inch |
| 5+ bathrooms | 20+ GPM | 1,000,000+ gallons | 1 inch or larger |
Watch the port size. A system with 3/4-inch inlet and outlet ports physically cannot deliver the same flow as a 1-inch ported unit — no matter what the GPM rating on the box says. Homes with 1-inch main supply lines (standard in builds after 2000) will hit a permanent bottleneck with undersized ports.
Quick sizing formula: count your peak simultaneous fixtures, multiply by their average GPM draw, and add 20%. That buffer covers aging pipes, pressure swings, and the reality that households grow over time.
Installation and Cost Breakdown
Equipment runs $300 to $4,000. Professional installation adds $200 to $600 depending on plumbing complexity. Most homeowners land in the $800–$2,500 total range — wide enough that understanding your tier saves real money.
Equipment Cost by System Tier
Single-stage sediment or carbon systems start at $300–$700 — adequate for city water with minimal contamination. Multi-stage systems (the most popular choice) fall between $700 and $2,000, typically combining sediment, carbon, and specialty media. High-end configurations with UV, iron filtration, or salt-free softening reach $2,500–$4,000 before labor.
| System Tier | Equipment Cost | Labor Cost | Total Installed | Best For |
|---|---|---|---|---|
| Entry-Level (1–2 stage) | $300–$700 | $200–$350 | $500–$1,050 | City water, low contaminant load |
| Mid-Range (3–4 stage) | $700–$2,000 | $300–$500 | $1,000–$2,500 | Most households, city or mild well water |
| High-End (4+ stage + UV) | $2,500–$4,000 | $400–$600 | $2,900–$4,600 | Well water, heavy metals, bacteria concerns |
What Drives Installation Labor Costs
Plumbers charge more when they need to cut into copper or CPVC mainlines, add bypass valves, or reroute piping around an existing water softener. Tight utility closets and port size upgrades (3/4-inch to 1-inch) push labor toward the $450–$600 range. A straightforward install on accessible PEX plumbing with nearby shutoff valves typically wraps in two to three hours.
Ongoing Ownership Costs
Annual filter replacement runs $100–$300 for a mid-range system. Sediment pre-filters cost $10–$20 each and need swapping every three months. Carbon filters run $50–$150 annually. Specialty media lasts one to two years at $80–$200 per replacement. UV bulbs add $30–$60 per year.
Over a decade, a properly maintained whole home system costs less per year than most households spend on bottled water in a single month.
Maintenance Schedule at a Glance
| Component | Replacement Interval | Approximate Cost | Signs It’s Due |
|---|---|---|---|
| Sediment pre-filter | Every 3 months | $10–$20 | Visible discoloration, pressure drop |
| Carbon filter | Every 6–12 months | $50–$150 | Chlorine taste/smell returns |
| Specialty media | Every 1–2 years | $80–$200 | Target contaminant reappears in testing |
| UV bulb | Every 12 months | $30–$60 | Indicator light or annual timer |
| O-rings and housing seals | Every 1–2 years | $5–$15 | Minor drips at filter housing joints |
Frequently Asked Questions
How long does a whole home water filtration system last?
The housing and frame typically last 10–15 years. Filter media needs periodic replacement (see the maintenance schedule above), but the system itself rarely requires full replacement if maintained properly. Stainless steel housings tend to outlast plastic ones by several years.
Do whole house filters reduce water pressure?
A properly sized system causes minimal pressure loss — usually 2–5 PSI. Noticeable pressure drops almost always trace back to undersized port connections, a clogged sediment filter that’s overdue for replacement, or a system rated below the household’s peak GPM demand.
Can I install a whole home water filter myself?
Homeowners comfortable with basic plumbing can handle a DIY install on PEX or push-fit connections in 3–5 hours. Copper or CPVC mainlines require soldering or specialized fittings that most people should leave to a licensed plumber. Either way, installing a bypass valve is strongly recommended — it lets you service filters without shutting off water to the entire house.
What is the difference between a water filter and a water softener?
A water filter removes contaminants — chlorine, lead, sediment, VOCs, bacteria. A water softener specifically removes hardness minerals (calcium and magnesium) through ion exchange, preventing scale buildup in pipes and appliances. Many households benefit from both, installed in sequence on the main line.
Do I need a whole home filter if I have city water?
Municipal treatment kills pathogens but doesn’t remove chlorine taste, disinfection byproducts, lead from aging service lines, or emerging contaminants like PFAS. A whole home system addresses all of these at once. Whether you need one depends on your local water quality report — request it free from your utility or check the EPA’s Consumer Confidence Report database.
How do I know which contaminants are in my water?
City water users can request a free Consumer Confidence Report (CCR) from their water utility annually. Well water users should test through a certified lab at least once a year — the EPA recommends testing for coliform bacteria, nitrates, pH, and total dissolved solids as a baseline. State health departments often offer low-cost testing programs.
Is a whole home water filtration system worth the investment?
A mid-range system costs roughly $1,000–$2,500 installed and $150–$300 per year to maintain. Compare that to buying bottled water for a family of four — easily $600–$1,200 annually — and the system pays for itself within two to three years while also protecting appliances from scale damage and extending their lifespan.
What certifications should I look for?
NSF/ANSI 42 for chlorine and taste. NSF/ANSI 53 for lead and VOCs. NSF P473 for PFAS. NSF/ANSI 44 for water softening. NSF/ANSI 55 for UV disinfection. A system carrying multiple NSF certifications has been independently tested — not just manufacturer-claimed — for contaminant reduction performance.
Making the Right Choice
A whole home water filtration system is one of those purchases where getting it right the first time saves hundreds of dollars and years of frustration. Start with your water source — city or well — and get a current water quality report. Match the system type and filter stages to the contaminants actually present. Size it for peak household demand with a 20% buffer. Budget for both installation and the ongoing cost of filter replacements.
The technology is mature, the certifications are standardized, and the price range accommodates everything from a basic city-water carbon setup to a full well-water treatment train. The only real mistake is buying blind — without knowing what’s in your water or how much flow your home actually needs.