Clogged dryer vents cause an estimated 13,820 home structure fires each year in the United States, according to the National Fire Protection Association. Lint is the ignition source in roughly one-third of those incidents. If your clothes take two full cycles to dry or the dryer cabinet feels scorching hot mid-run, a blocked vent is almost certainly the culprit.
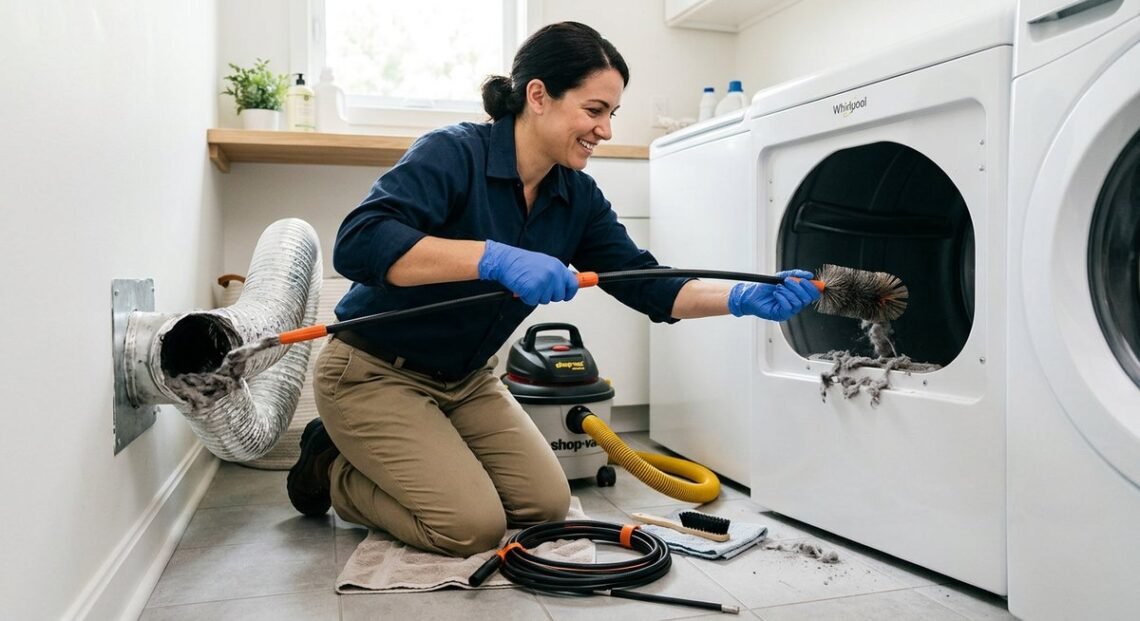
Cleaning out the dryer vent is a 30- to 60-minute job most homeowners can handle with a brush kit, a vacuum, and a screwdriver. Below: the warning signs that signal a clog, the exact tools you need, a numbered walkthrough of the cleaning process, guidance on when to call a professional, and a simple maintenance schedule to keep lint from building up again.
Warning Signs Your Dryer Vent Is Clogged
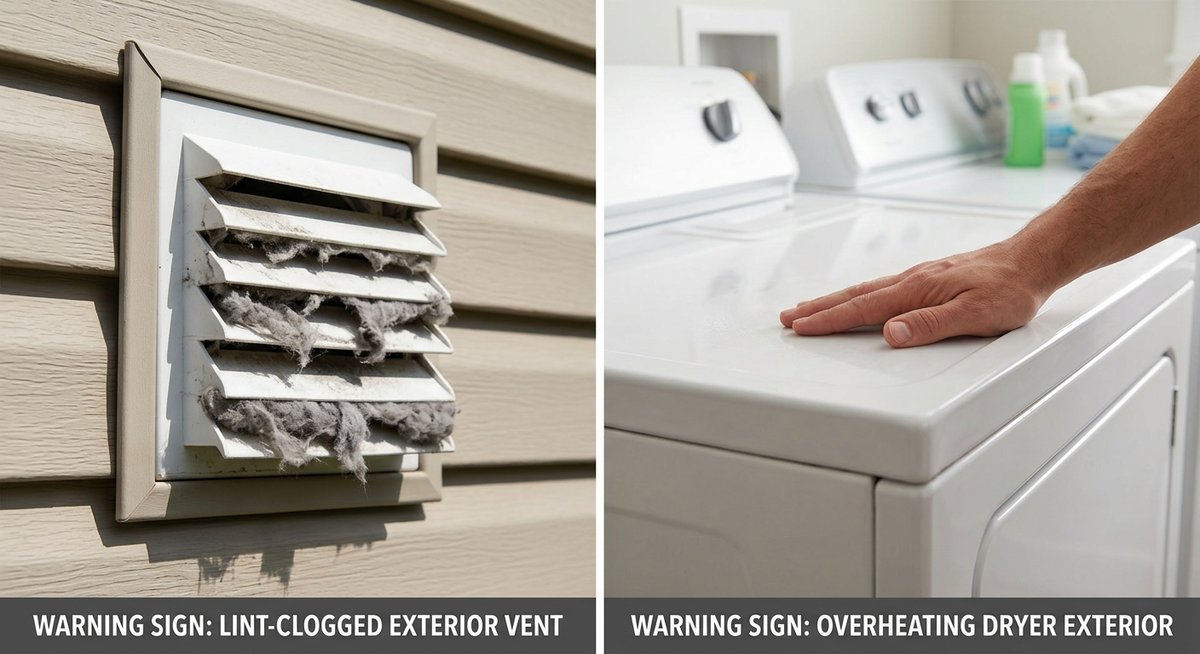
Five reliable symptoms indicate a blocked dryer vent: clothes still damp after a standard cycle, a dryer exterior that’s unusually hot to the touch, a burning smell during operation, visible lint around the outdoor vent hood, and a lint trap that fills up faster than normal. Any single one of these warrants inspection; two or more together mean the vent needs immediate cleaning.
Performance Red Flags
A full cycle that leaves clothes damp is the most obvious sign. Restricted airflow traps moisture inside the drum instead of exhausting it outdoors, so the dryer spins without actually drying.
Run your hand along the dryer exterior mid-cycle. An abnormally hot surface means heat is backing up inside rather than venting out. Standard loads that consistently exceed 45 minutes point to the same root cause: the duct can’t move air fast enough.
Smell and Appearance Clues
A burning smell during operation is the most urgent flag on this list. Lint is highly flammable, and when it accumulates near the heating element or inside a restricted duct, that smell is the last warning before ignition.
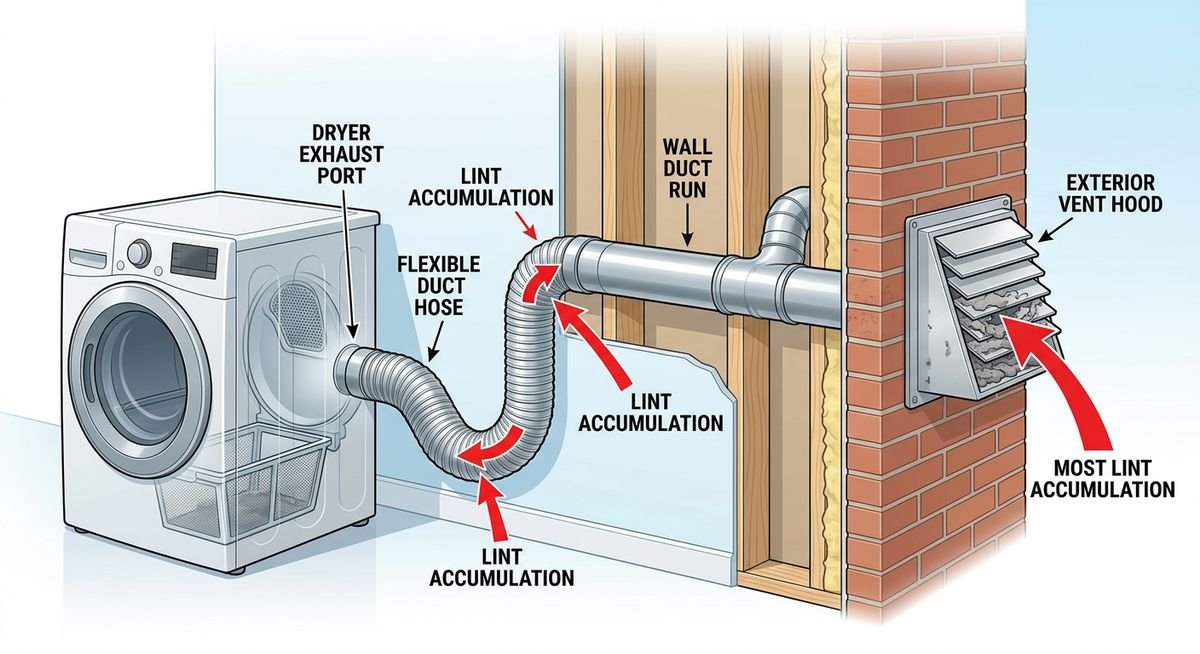
Check two spots visually. First, the lint trap: if it fills faster than usual, lint that should exit through the duct is backing up. Second, the exterior vent hood: visible lint clinging to the louvers, or louvers that barely open during a cycle, confirms the blockage has reached the outside termination point.
| Warning Sign | What It Indicates | Urgency |
|---|---|---|
| Clothes damp after full cycle | Restricted airflow trapping moisture | High |
| Dryer exterior hot to the touch | Heat backing up in cabinet | High |
| Burning smell during operation | Lint near heat source — fire risk | Immediate |
| Lint on exterior vent louvers | Blockage at termination point | High |
| Lint trap filling faster than usual | Backpressure pushing lint backward | Moderate |
Tools and Materials You’ll Need
Three items are essential: a dryer vent brush kit with flexible extension rods, a vacuum with a narrow hose attachment, and a screwdriver. A handful of optional supplies — foil tape, a leaf blower, gloves, a dust mask — make the job easier for longer or more complex duct runs. Gather everything before you start so you never pause mid-job to hunt for a tool.
Essential Cleaning Tools
A dryer vent brush kit is the non-negotiable centerpiece. These kits include a flexible lint brush head and interlocking extension rods — typically reaching 12 to 24 feet combined — so you can scrub the full length of the duct from a single access point.
A vacuum with a narrow hose attachment handles what the brush loosens. Without it, you’re relocating lint deeper into the duct rather than removing it. A flathead or Phillips screwdriver loosens the metal clamp that secures the flexible exhaust hose to the dryer’s exhaust port.
| Tool | Purpose | Why It Matters |
|---|---|---|
| Dryer vent brush kit | Scrubs lint from duct walls | Reaches full duct length; dislodges compacted lint |
| Vacuum + narrow attachment | Extracts loosened debris | Removes lint rather than redistributing it |
| Screwdriver (flathead/Phillips) | Loosens duct clamp | Required to disconnect the exhaust hose safely |
Optional but Helpful Supplies
For duct runs longer than 10 feet or configurations with multiple bends, a leaf blower or compressed air canister flushes debris that a brush alone won’t dislodge. Blow from the dryer end toward the exterior opening — never the reverse — to push lint out rather than pack it in.
Foil HVAC tape (not standard duct tape, which degrades under heat) reseals any connections you disturb during reassembly. Work gloves protect against sharp sheet-metal edges inside the duct collar. A dust mask keeps you from inhaling fine lint particulate, especially in tight or poorly ventilated laundry rooms.
How to Clean Your Dryer Vent: Step-by-Step
The full process takes 30 to 45 minutes for a standard straight duct run: disconnect power, detach the duct hose, scrub from both ends with a flexible brush kit, vacuum all loosened lint, reassemble, and confirm airflow at the exterior vent hood. Longer runs with bends add 15 to 20 minutes.
Before You Begin — Safety First
For electric dryers, unplug the power cord completely from the wall outlet — powering the dryer off at the control panel is not sufficient. For gas dryers, locate the gas supply valve behind the unit and turn it to the closed position before moving anything.
| Dryer Type | Required Safety Step | Where to Act |
|---|---|---|
| Electric | Unplug power cord fully | Wall outlet behind dryer |
| Gas | Close gas supply valve | Valve on gas line behind dryer |
Steps 1-4: Disconnect and Access the Duct
- Pull the dryer away from the wall. Create at least 18 inches of clearance. Gas dryers have a supply line that limits travel distance, so move slowly.
- Loosen the duct clamp with a screwdriver and detach the flexible hose from the dryer’s exhaust port. Set the clamp somewhere visible so it doesn’t get vacuumed up.
- Shine a flashlight into the duct opening at the wall. Heavy gray lint matting near the entry means the vent has been neglected for a while; a light dusting means you caught it early.
- Insert the flexible brush rod into the duct and scrub in a steady rotating motion. Add extension rods as you push deeper, moving loosened lint toward the exterior opening.
Steps 5-8: Clean, Vacuum, and Reassemble
- Vacuum all loosened lint from inside the duct opening and around the dryer’s exhaust port. The narrow hose attachment reaches spots a brush can’t.
- Go outside and remove the exterior vent cover. Brush and vacuum from the outside opening inward. This second-direction pass dislodges lint that the interior brush pushed toward the flap but didn’t fully clear.
- Reattach the vent cover, reconnect the duct hose, and seal any gaps with foil HVAC tape. Standard duct tape dries out and fails under sustained dryer heat — only use the foil kind.
- Restore power (or open the gas valve), run the dryer on air-fluff for 10 to 15 minutes, and walk outside to confirm strong airflow at the exterior vent. The flap should open noticeably with each cycle. Weak airflow means lint is still trapped somewhere in the run.
DIY vs. Professional Dryer Vent Cleaning
Most homeowners with a straight duct run under 15 feet can clean their own dryer vent effectively. Longer runs, multiple 90-degree bends, rooftop terminations, or ducts routed through interior walls are better handled by a professional with powered rotary brush equipment and a borescope camera to verify the duct is fully clear.
When DIY Is the Right Call
Short, accessible vent runs are straightforward. If you can reach both the dryer exhaust port and the exterior vent hood without climbing a ladder or opening drywall, the brush-kit method above handles the job. Budget: $20 to $40 for a quality brush kit that lasts for years.
When to Hire a Professional
Three scenarios warrant professional cleaning. First, duct runs exceeding 25 feet or with more than two 90-degree elbows create lint traps that a manual brush can’t reach reliably. Second, rooftop vent terminations require ladder access and specialized tools. Third, if you’ve cleaned the vent yourself and the dryer still overheats or takes too long, the obstruction may be deeper than a brush kit can handle — or the duct itself may be damaged.
Professional dryer vent cleaning typically costs $100 to $200 depending on duct length and accessibility. Many technicians include a borescope inspection to confirm complete clearance.
| Factor | DIY | Professional |
|---|---|---|
| Duct length | Under 15 ft, straight run | Over 25 ft or multiple bends |
| Vent location | Ground-level exterior wall | Rooftop or interior wall routing |
| Cost | $20-$40 (one-time kit purchase) | $100-$200 per visit |
| Verification | Airflow check at exterior vent | Borescope camera inspection |
How to Prevent Lint Buildup Between Cleanings
Regular maintenance extends the interval between deep cleans and reduces fire risk year-round. Five habits make the biggest difference: clean the lint trap before every load, inspect the exterior vent quarterly, use rigid metal ducting instead of flexible plastic or foil, keep the duct run as short and straight as possible, and avoid overloading the dryer.
Daily and Quarterly Habits
Clean the lint trap before every single load — not after. A clogged screen forces lint into the duct system instead of catching it. Once per quarter, walk outside and check the vent hood while the dryer is running. The flap should swing open freely. If it doesn’t, lint is accumulating at the termination point and a cleaning is overdue.
Duct Material Matters
Rigid aluminum or galvanized steel ductwork is the gold standard. The smooth interior walls resist lint accumulation far better than corrugated flex hose, which traps fibers in every ridge. If your dryer currently connects with white plastic or foil accordion-style hose, replacing it with rigid or semi-rigid metal is the single most impactful upgrade you can make — many building codes now require it.
| Duct Material | Lint Resistance | Fire Safety | Code Compliant |
|---|---|---|---|
| Rigid aluminum | Excellent | Best | Yes |
| Semi-rigid aluminum | Good | Good | Yes |
| Foil flex hose | Poor | Moderate | Varies |
| Plastic/vinyl flex hose | Poor | Poor (flammable) | No (banned in most areas) |
Frequently Asked Questions
How often should you clean out a dryer vent?
At least once per year for average household use. Families running five or more loads per week should clean every six months. Homes with long duct runs (over 15 feet) or ducts with multiple bends accumulate lint faster and benefit from twice-yearly cleaning regardless of laundry volume.
Can I clean my dryer vent myself?
Yes, if the duct is accessible from both ends and runs under 15 feet with minimal bends. A dryer vent brush kit ($20-$40) and a vacuum handle most residential setups. For rooftop vents, ducts running through interior walls, or runs exceeding 25 feet, hire a professional with powered rotary equipment.
What happens if you never clean your dryer vent?
Lint accumulates progressively, restricting airflow. The dryer works harder, uses more energy, and wears out faster. At a certain point, the heat buildup ignites the lint itself. The NFPA attributes roughly 34% of residential dryer fires to failure to clean the vent — making it the single leading cause of dryer-related house fires.
How do I know if my dryer vent is clogged?
The five most reliable indicators: clothes still damp after a full cycle, a dryer cabinet that’s hot to the touch, a burning smell during operation, visible lint around the exterior vent hood, and the lint trap filling faster than normal. Walk outside while the dryer is running — if the exterior flap barely moves, airflow is compromised.
Does cleaning the dryer vent save energy?
Significantly. A clogged vent forces the dryer to run longer cycles, sometimes doubling the energy consumption per load. The U.S. Department of Energy estimates that a clean vent can reduce drying time by up to 25%, which translates directly to lower electricity or gas bills over the course of a year.
Is a leaf blower effective for cleaning dryer vents?
A leaf blower works well as a supplement to brushing, particularly for duct runs over 10 feet. Position the blower at the dryer end and blow toward the exterior opening. It won’t dislodge compacted lint the way a brush does, but it clears loose debris effectively after the initial scrubbing pass.
Your Dryer Vent Maintenance Schedule
Cleaning out the dryer vent annually prevents house fires, cuts energy bills, and extends the dryer’s lifespan. The entire job takes under an hour for most homes and requires nothing more than a brush kit, a vacuum, and a screwdriver. Stick to a simple maintenance rhythm and you won’t need to think about it between cleanings.
| Frequency | Task |
|---|---|
| Every load | Clean the lint trap before starting the dryer |
| Quarterly | Inspect exterior vent flap while dryer is running |
| Annually | Full duct cleaning (brush kit + vacuum from both ends) |
| Every 6 months | Deep clean if duct exceeds 15 ft, has bends, or uses corrugated hose |
| Every 3-5 years | Replace flex hose with rigid metal ducting (if applicable) |
For anything beyond a straightforward wall-exit duct, a professional cleaning at $100-$200 is worth the peace of mind and the borescope verification that the duct is truly clear.

